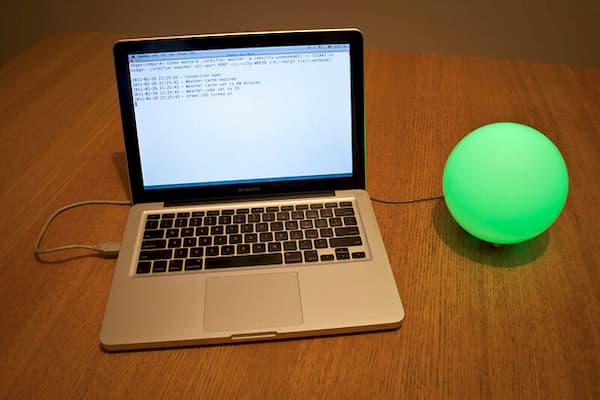
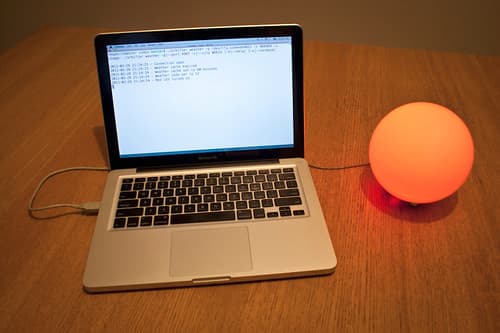
An internet-connected lamp
A homebrew color changing lamp with Arduino.
The Internet of Things is the idea of an internet of devices: your umbrella could glow when it will rain or you could get a lamp that uses color to show weather forecasts. Cool, but it costs $150 and is sold out. Any chance we can make one ourselves?
What follows is my very first Arduino project, feel free to comment and improve wherever you see fit.


Project outline
Let’s keep it simple for now. We’ll put a red and green LED in the lamp that we can control separately via USB. This will allow us to show whatever information we can translate in a simple red or green. Some possible use cases:
- Will it rain tomorrow? Yes or no?
- Is my train delayed? Yes or no?
- Do I have new e-mail? Yes or no?
This list is endless of course and that’s exactly why we build it ourselves. Maybe you want to be notified when there is a traffic jam on your way to work? No problem.
What we need
| Arduino | €24 |
|---|---|
| Lamp | €5 |
| LEDs | 2 × €0.50 |
| 220Ω resistor | €0.15 |
| Wires | €1 |
| USB cable | €2.50 |
| Total | €33.65 |
The wiring
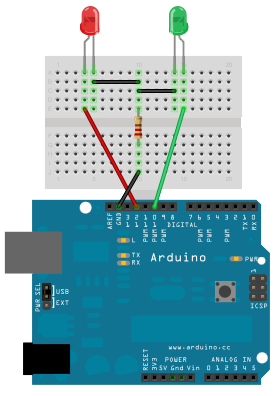
The Arduino will serve as a serial port between the computer and the lamp. It will translate the “turn green” command to a high voltage on one of the Arduino pins. The “turn red” command is exactly the same but uses another pin. The resistor will make sure we don’t burn the LEDs.
Connect the 5 wires as shown:

Hide the LEDs and wires in the lamp (together with the Arduino if you can) and connect the USB cable to the computer.
The Arduino software
We need some software on the Arduino which will listen to serial commands on the connected USB cable and send a high voltage to the green or red pin when the computer tells it so. Download the Orb Arduino sketch and upload it to the Arduino.
The Arduino will now listen for the command “G”. The capital G will turn the green LED on, and the red off. Everything else will turn the red one on and the green one off. Turning on the green LED means it will set pin 10 (green) to HIGH and ping 13 (red) to LOW.
The computer software
Now we need something to tell the Arduino which LED it should turn on. Download the Ruby orbifier script.
At the time of writing, there are 3 parsers: a Yahoo! Weather forecast parser, a Belgian train delay parser, and a Gmail new mail parser. Feel free to write your own if you want. The parser will check online and send “G” to the Arduino of it wants to turn on the green light, it will send “R” if it wants the red light turned on.
You should be good to go. Run one of the orbifier parsers to turn on the light. Check for new e-mail for example:
./orbifier gmail -p /usb/tty.usbmodem441 -a example@gmail.com -s 12345
What’ next?
The next step would be to add a wireless shield to the Arduino so that the computer isn’t needed anymore (for now you are limited by the length of the cable between the Arduino and the computer).
Links
- The project page at Github contains the source code for both the Arduino and computer part and some more detailed information.
- Here are some more photos from the finished project.